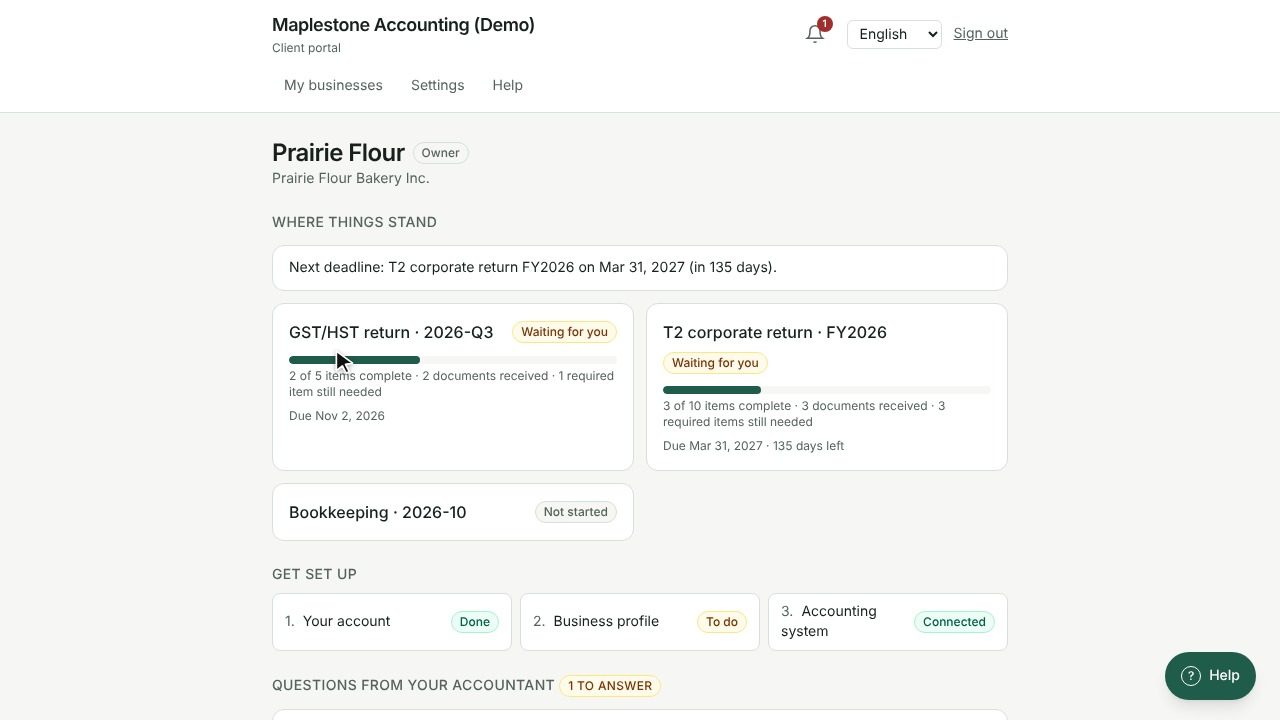
Each business on My businesses shows three setup steps. Finishing them gives your accountant your up-to-date details and, if you choose, a view of your books.
See where you are
- Go to My businesses.
- Each business card lists the steps: 1. Your account, 2. Business profile and 3. Accounting system.
- Each step shows its status: Done, To do, Skipped or Connected.
- Select Continue setup to open the business and pick up where you left off. Once everything is finished, the card shows Open and the business page shows Setup complete.
Step 1: Your account
This step is done as soon as you accept your invitation and choose a password. There's nothing else to do.
Step 2: Business profile
The Business profile tells your accountant how to reach you and a little about the business.
- Open the business and scroll to Business profile.
- Fill in what applies:
- Address, City, Province or state and Postal or ZIP code
- Phone, Business email and Website
- Industry and What does the business do?
- Number of employees
- Tick We run payroll and We're registered for sales tax (GST/HST/QST or state sales tax) if they apply
- Select Send to your accountant.
You'll see Waiting for your accountant's review until your accountant checks the details, then Reviewed by your accountant on and the date. If something changes later, update the form and send it again.
Tip: Only owners and authorised representatives can change the profile. If your role is Staff (view only), you can read it but not edit it.
Step 3: Accounting system
This step lets you connect QuickBooks Online or Xero so your accountant can see your books.
- To connect, select your accounting software in the Accounting system section and follow the prompts. See "Connecting your accounting software" for the details.
- Not ready, or don't use either one? Select Skip for now. The step shows Skipped and your setup can still be completed.
- You can come back and connect at any time.