Tickloft reads every document your clients send, pulls out the key values and matches it to the engagement checklist. This article explains how documents arrive, what happens to them and how to check the results.
Upload documents
Clients can upload through the client portal or a secure upload link. You can also upload on their behalf:
- Open the client and select the Documents tab.
- Select Upload documents, then Choose files (or Take a photo on a phone).
- Each file shows Received when it has arrived, or Not accepted with the reason.
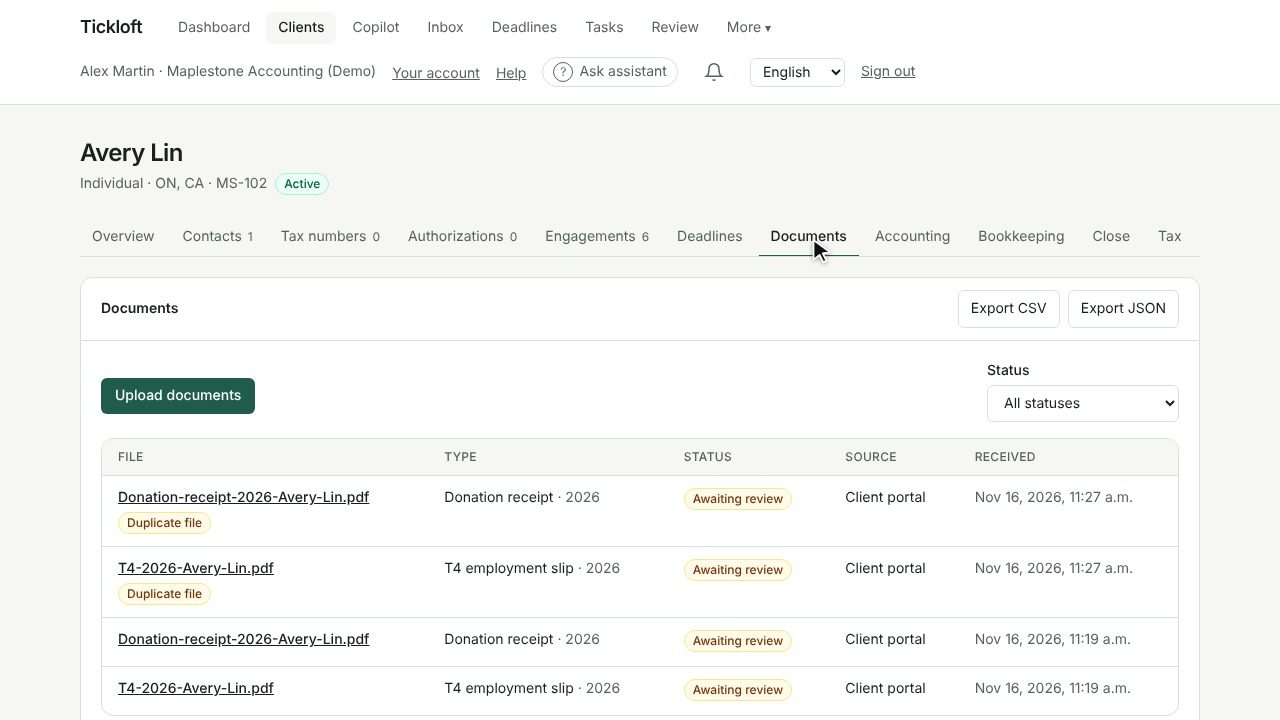
The Source column shows where each document came from: Staff upload, Client portal, Secure link or Email.
What happens after upload
Every document goes through the same steps automatically:
- Security scan: files that fail the scan are blocked and never shown.
- Text recognition: the text is read from the pages, including scans and photos.
- Classification: Tickloft identifies the document type, such as a T4, an RL slip (RL-1, 2, 3, 8, 10, 16, 18, 24, 25 or 31), a W-2, a bank statement or a supplier invoice. On a tax workpaper, Québec RL slips are totalled in their own Québec (TP-1) section so they never double the income on the federal slips.
- Extraction: key values are read, such as boxes on a slip, totals, dates and names.
- Automatic checks: for example, whether totals add up or the tax year is plausible.
- Checklist matching: the document is linked to the right item on the engagement's checklist.
The result then goes to the Review queue as a client document. Nothing is final until someone approves it.
Understand document statuses
- Received: the file has arrived and is waiting to be processed.
- Processing: the steps above are under way.
- Awaiting review: values are extracted and waiting in the review queue.
- Accepted: someone approved the extracted values.
- Rejected: someone rejected them.
- Failed: the document couldn't be processed. The reason is shown, for example a failed security scan or no readable text.
Temporary problems are retried automatically. Owners, admins and reviewers can select Reprocess on a failed document. Owners and admins see all failed documents under Governance → Document failures.
Check a document against the original
Open any document to see the evidence side by side:
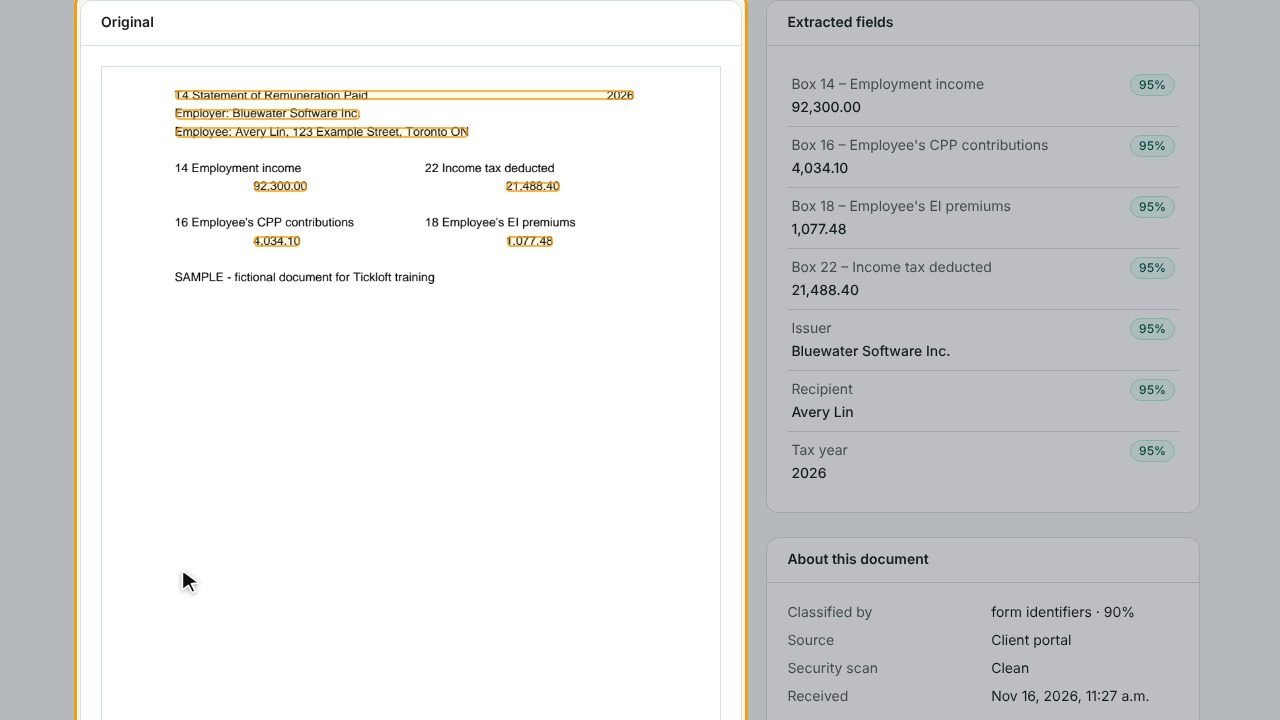
- Original: the page images, with Previous page and Next page.
- Extracted fields: each value Tickloft read. Sensitive numbers, such as a SIN, are Masked. Values changed by a reviewer show Corrected.
- Automatic checks: any errors or warnings found.
- About this document: how it was classified, the Security scan result and Text recognition details.
Use Open review item to decide on it, or Open engagement to see its checklist.
Upload a new version
If a client sends a corrected slip, replace the old one rather than adding a duplicate.
- Open the existing document.
- Select Upload a new version and choose the file.
The new version is processed again. The Versions card keeps the full history, and older versions show A newer version of this document exists with a link to the current one.
Find documents
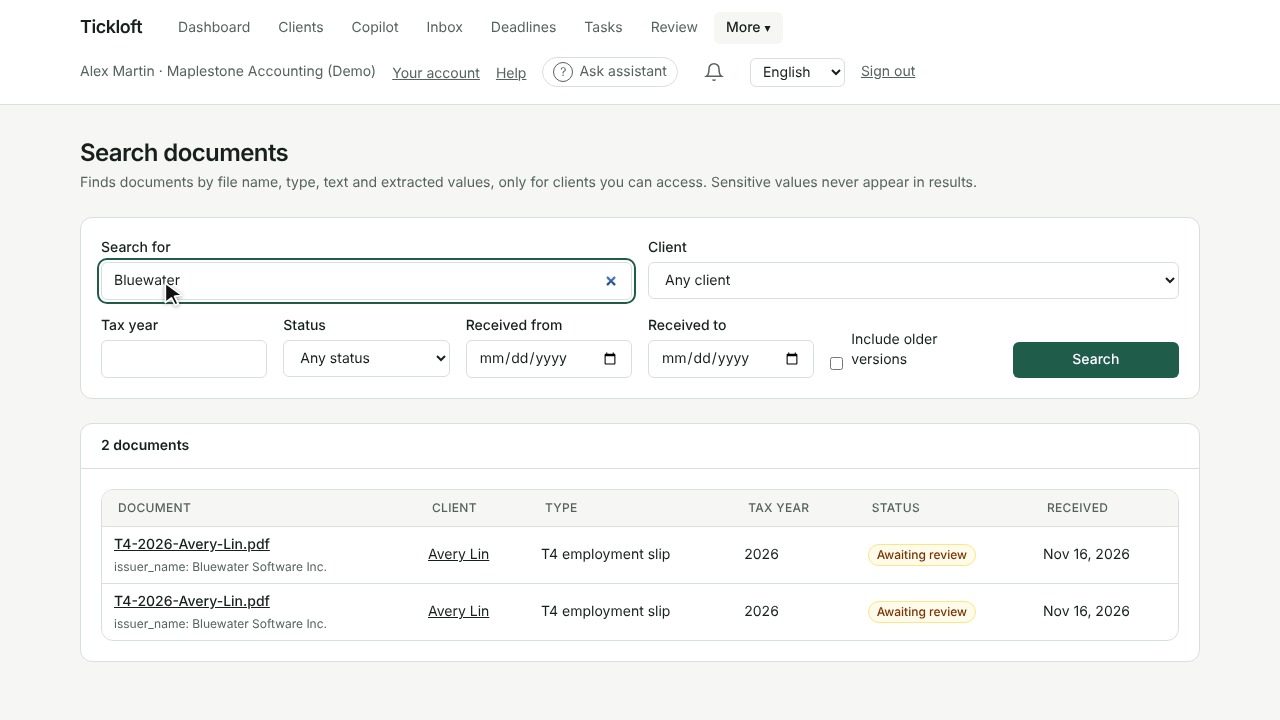
Use Search in the main navigation to find documents across every client you can access.
- Type a word or number in Search for: a supplier, slip type, amount or file name.
- Narrow the results by Client, Tax year, Status or date received.
- Tick Include older versions if you need replaced documents too.
Sensitive values never appear in search results. If you don't see Search, it isn't turned on for your firm.
Tip: On a client's Documents tab, use the status filter to see, for example, only documents awaiting review.
Export a document list
On the client's Documents tab, select Export CSV or Export JSON to download the client's documents with their type, tax year, status and extracted values. Corrected values replace the original reading, sensitive values stay masked, and the export is recorded in the audit log.