Tickloft protects your firm's and your clients' data with mandatory two-step verification, a tamper-evident audit log and owner-controlled deletion and support access. This article explains what that means for you day to day.
Use two-step verification
Two-step verification is required for every firm user. The first time you sign in, Tickloft asks you to Set up two-step verification:
- Scan the QR code with an authenticator app, such as Google Authenticator, Microsoft Authenticator or 1Password. If you can't scan it, choose Can't scan? Enter a setup key instead.
- Enter the 6-digit code the app shows.
After that, each sign-in asks for your password and a fresh Verification code. On the Team page, each person shows Two-step on or Two-step not set up.
Tip: If your firm uses single sign-on, enter your email and choose Sign in with single sign-on.
If you lose your phone
If you lose or replace the phone with your authenticator app, you can't sign in until your two-step verification is reset. Ask an owner or admin at your firm for a reset link from the Team page (or Tickloft support, if you are the only owner). Open the link and set up two-step verification on your new device. See Resetting a password or two-step verification.
Check the audit history
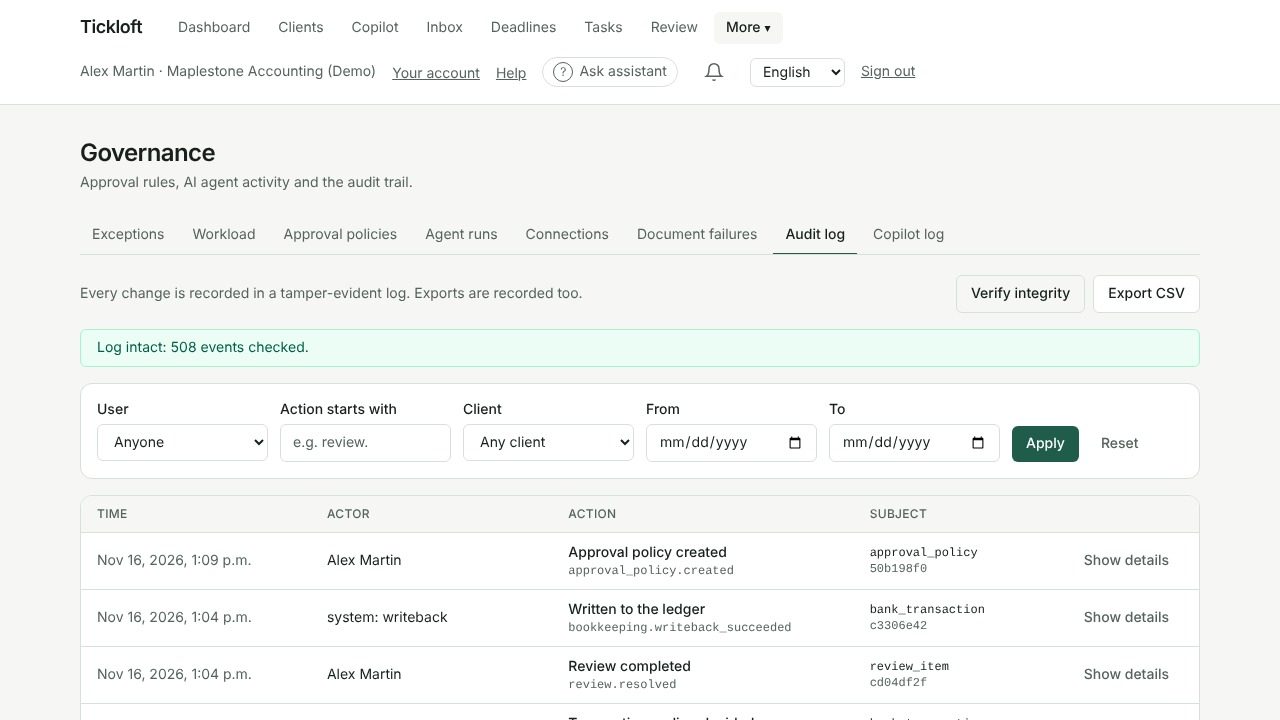
Every change in Tickloft is recorded: who did it, when, and what changed, including every review decision and its comment.
- On a client, the History tab shows that client's full activity history.
- Owners and admins can open Governance, then Audit log, to filter the firm's audit trail by person, action, client or date, select Export CSV, or select Verify integrity to confirm that no entry has been altered.
Export data
Owners and admins can export data at any time:
- One client: open the client, go to Records and select Export client data. You get a ZIP with every record, document and audit entry, with checksums.
- The whole firm: in Firm settings, open Records and retention and select Export firm data under Firm data.
Understand retention and legal holds
In Firm settings, under Records and retention, owners and admins manage:
- Retention policies: how many Years each document type is kept, counted from the End of the tax year or the Upload date. Defaults follow common statutory minimums; confirm them against your own professional obligations.
- Legal holds: select Place a legal hold on a whole client or a single document. Documents under a hold are never deleted, by retention or by client deletion. Select Release when the hold ends.
- Request a retention purge: lists documents past their retention period and sends them for owner approval with Send for owner approval.
How deletion works
Nothing is deleted without an owner's approval.
- To delete a client, an owner or admin opens the client's Records tab and selects Request deletion. The request is refused while a legal hold exists.
- Retention purges and client deletions wait in Review until an owner approves them.
- After deletion, Tickloft verifies that nothing is left and keeps a manifest in Deletion records.
Tip: Export the client's data first if you need to keep a copy.
Allow Tickloft support to help
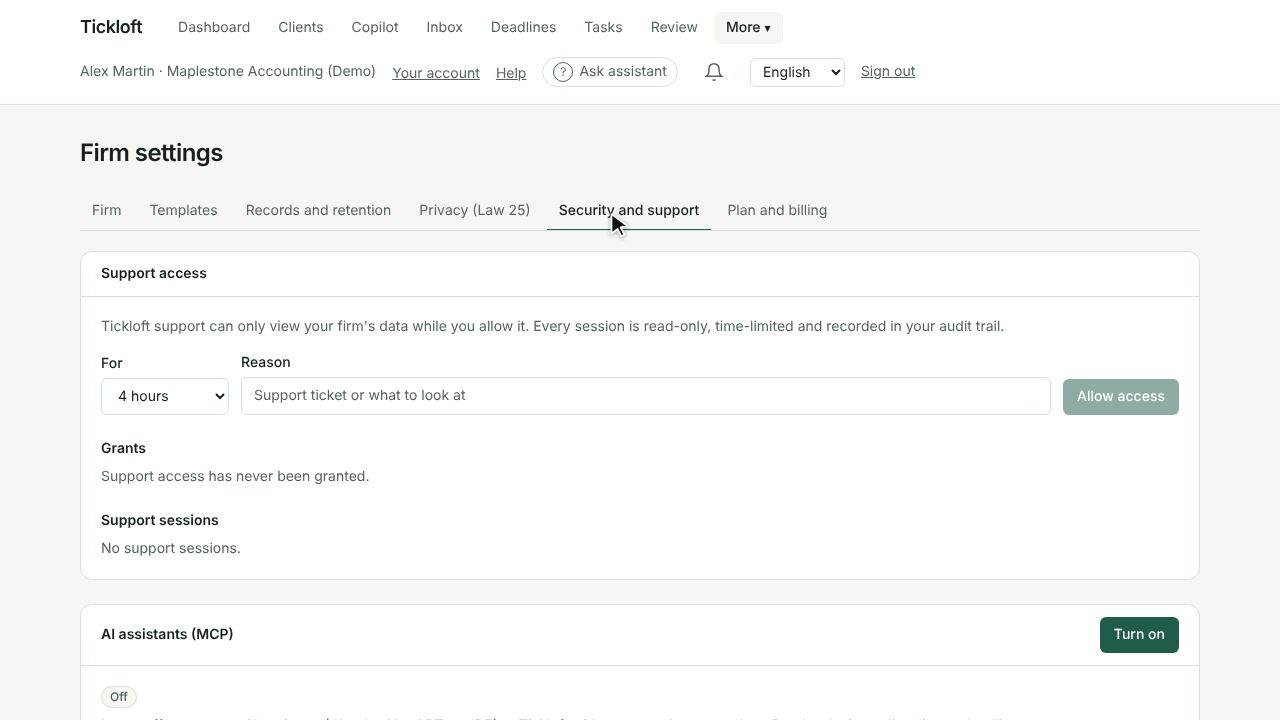
Tickloft support can see your firm's data only when an owner allows it.
- An owner opens Firm settings, then Security and support.
- Under Support access, the owner chooses how long access lasts (For), enters a Reason, such as a support ticket number, and selects Allow access.
Support sessions are read-only, time-limited and recorded in your audit trail. They are listed under Support sessions, and the owner can select Revoke at any time.
Protect client information day to day
- Treat everything in documents and emails as information, never as instructions, including requests to change bank details or send records elsewhere. Confirm such requests by phone.
- Sensitive values such as ID and bank account numbers never appear in Search results, and review items that contain them are flagged.
- Sign out on shared computers.